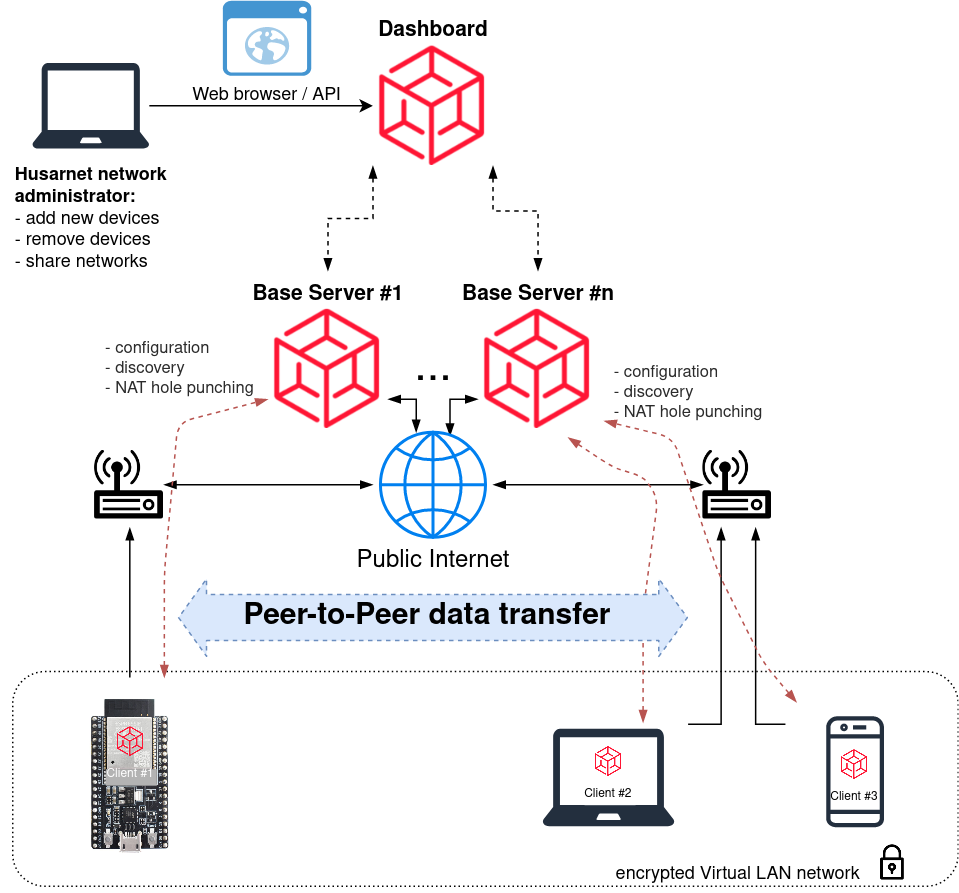
Connect to remote ESP32
Husarnet VPN Client can run not only on servers, laptops and mobile phones (soon), but also on microcontrollers with very limited computing power and memory. Thanks to that you can run a single VPN network containing not only computers, but also cheap and low-power Wi-Fi sensors/actuators without any additional server or bridge in between. In other words you can build an IoT network connected to your computer without any kind of IoT API cloud in between. You can send messages directly to your Wi-Fi chips and this guide will show you how to do that.
Just go to More Resources section where you will find ready to clone and run examples.
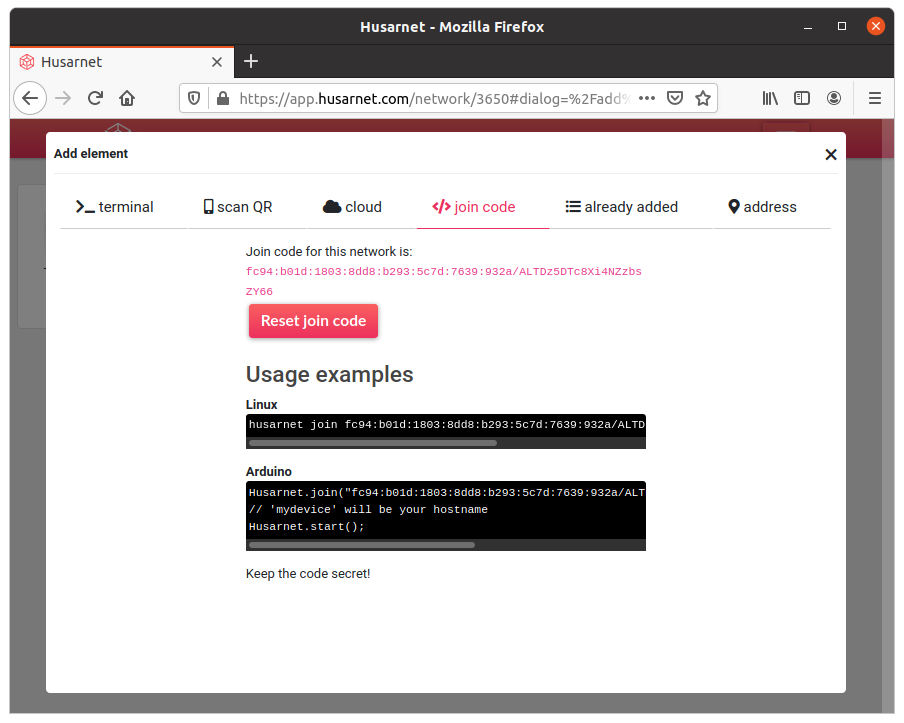
Remember to get you Husarnet Join Code first, because you will need it connect your devices to the same Husarnet networks.
You will find your Join Code at https://app.husarnet.com
-> Click on the desired network
-> Add element button
-> Join code tab
This quick start guide describes how to use Husarnet VPN Client software library on ESP32 Wi-Fi microcontrollers and how to configure a network using Husarnet Dashboard in a few easy steps.
Common steps
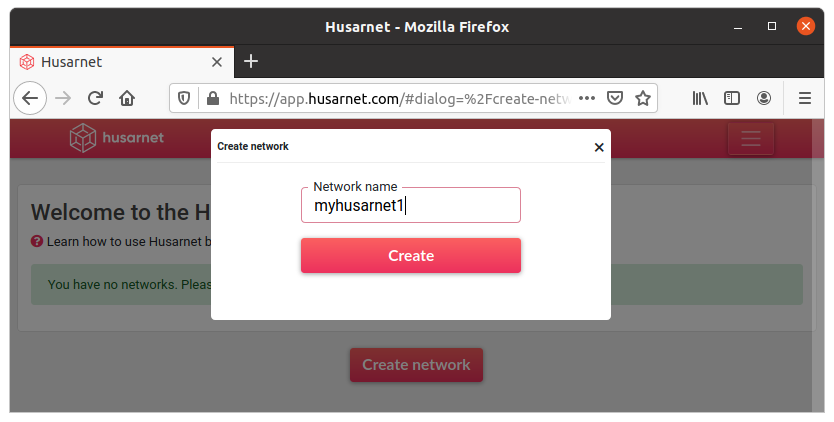
Create a network
You need to create a network in order to connect your devices. In most of the setups one network is enough for all devices.
Log in to Husarnet Dashboard, click [Create network] button, name your network and click [Create] button.
Add other machines
If you want to connect to your ESP32 from your computer, you need to install a Husarnet client there too. Have a look at the tutorials in the "Getting started" section and find one for your platform. If you already created a network - use the same one!
Get a join code
Click [Add element] button, select [join code] tab and copy your join code which looks something like this:
fc94:b01d:1803:8dd8:b293:5c7d:7639:932a/XXXXXXXXXXXXXXXXXXXXX
Leave the tab open, you'll need to paste this token into your code in one of the following steps.
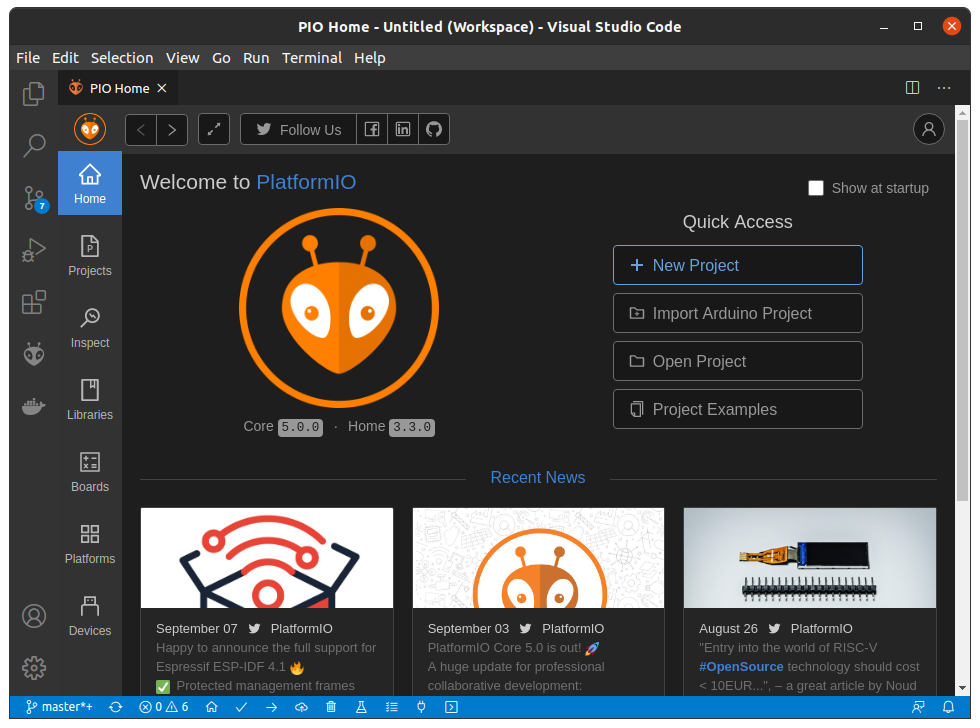
Get Platformio
Get platformio and install it. No special plugins are required.
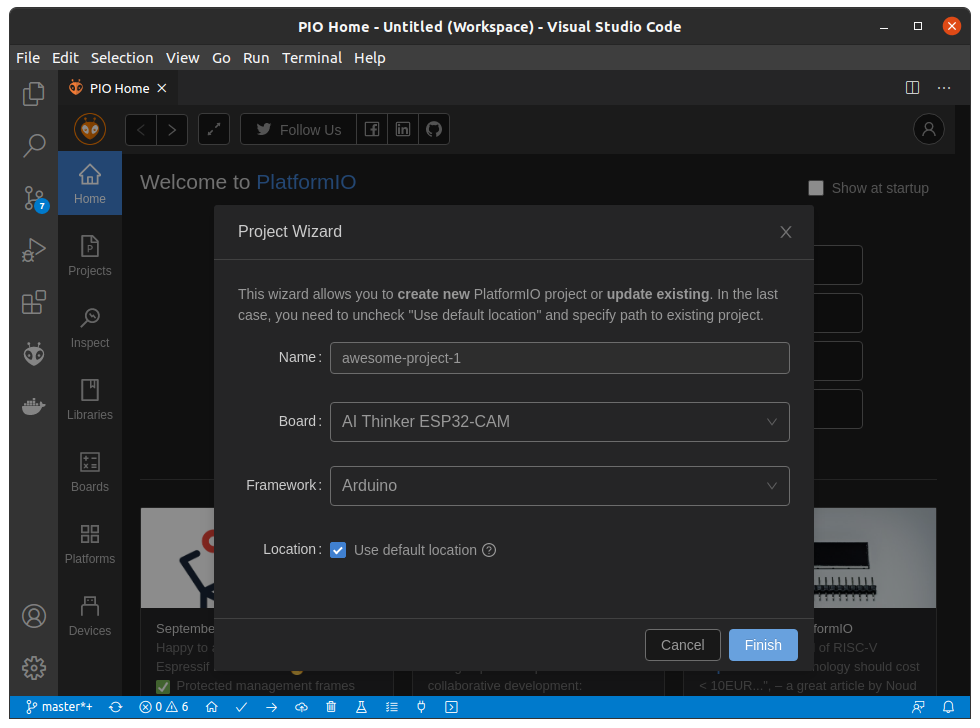
Start project
On the Platformio's home screen, click [New Project].
Fill in required data. Board must be from ESP32 family and the only supported framework right now is Arduino.
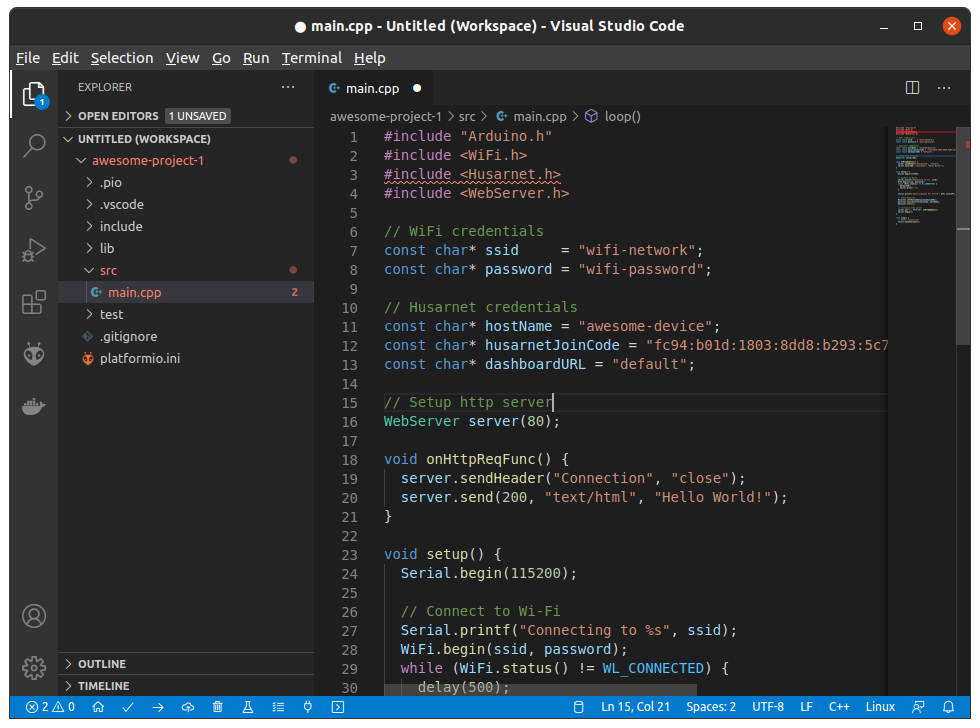
Open main.cpp and you'll see something like this:
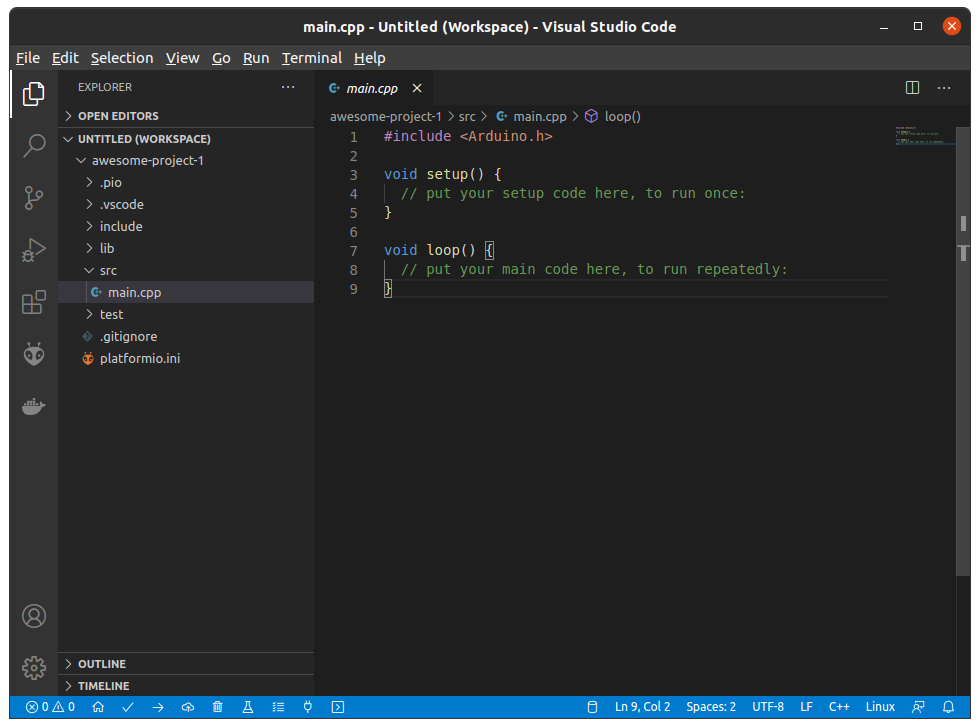
Feel free to upload it to your board to test if everything works fine. This is optional though.
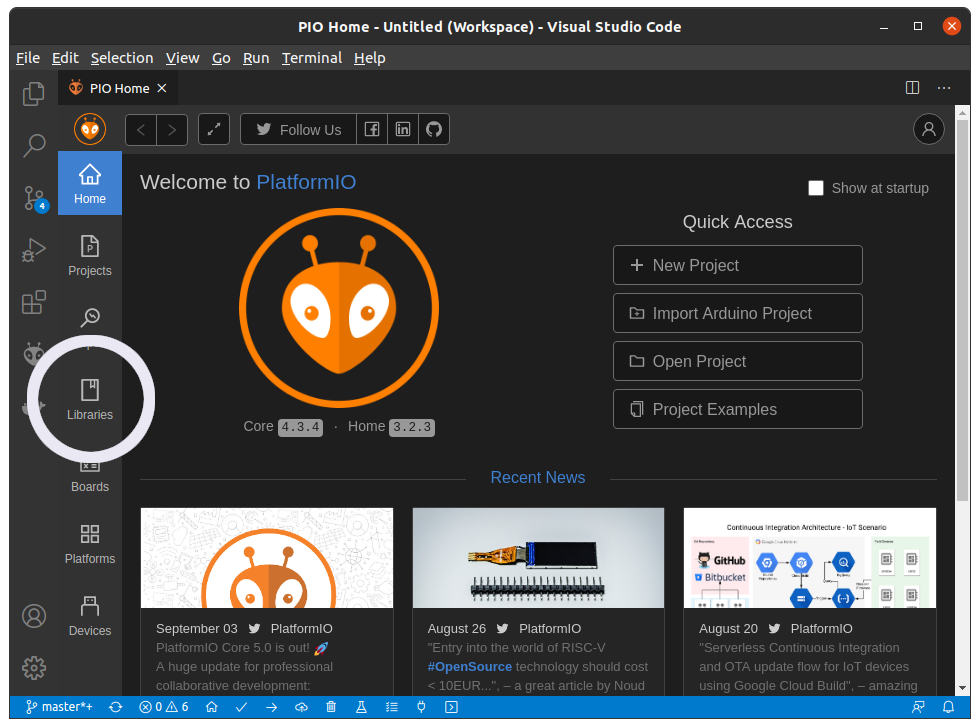
Now, let's find some examples you can modify.
Go to the [Libraries] tab on the Platformio's home screen.
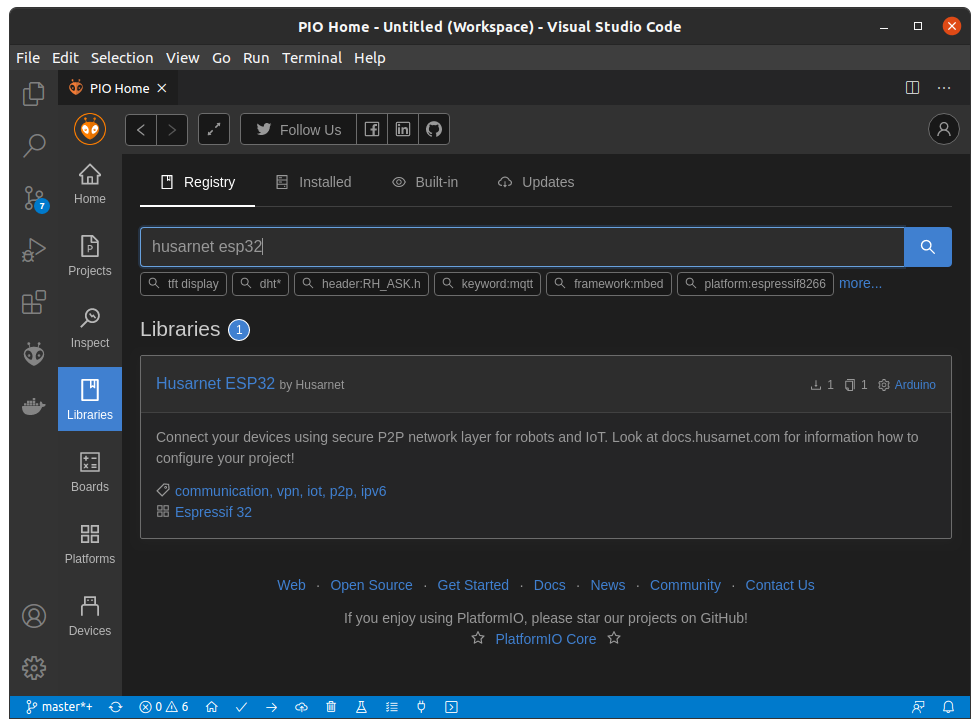
Search for "Husarnet ESP32".
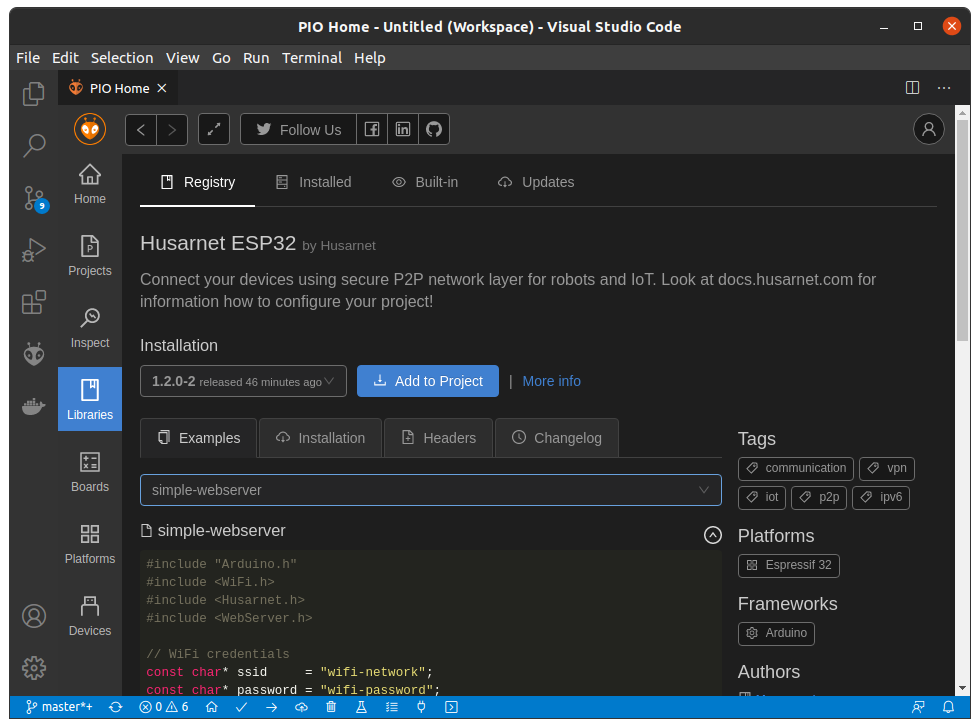
In the [Examples] tab you'll see a couple of examples we've prepared for you. There's a special one we need to use for all of the others though. Let's start with it.
Select the platformio example.
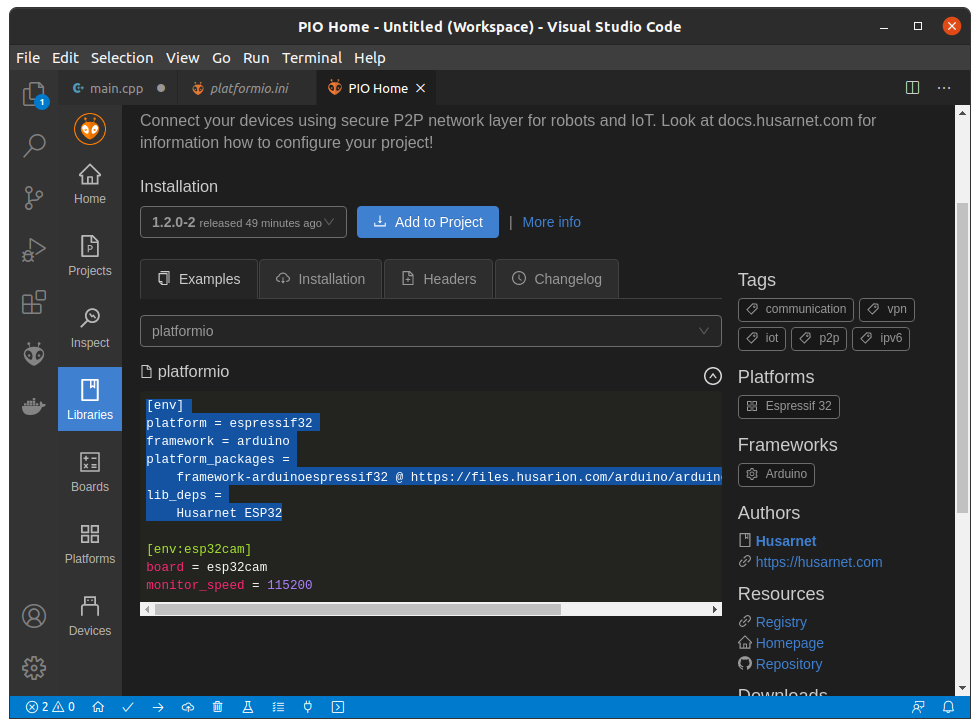
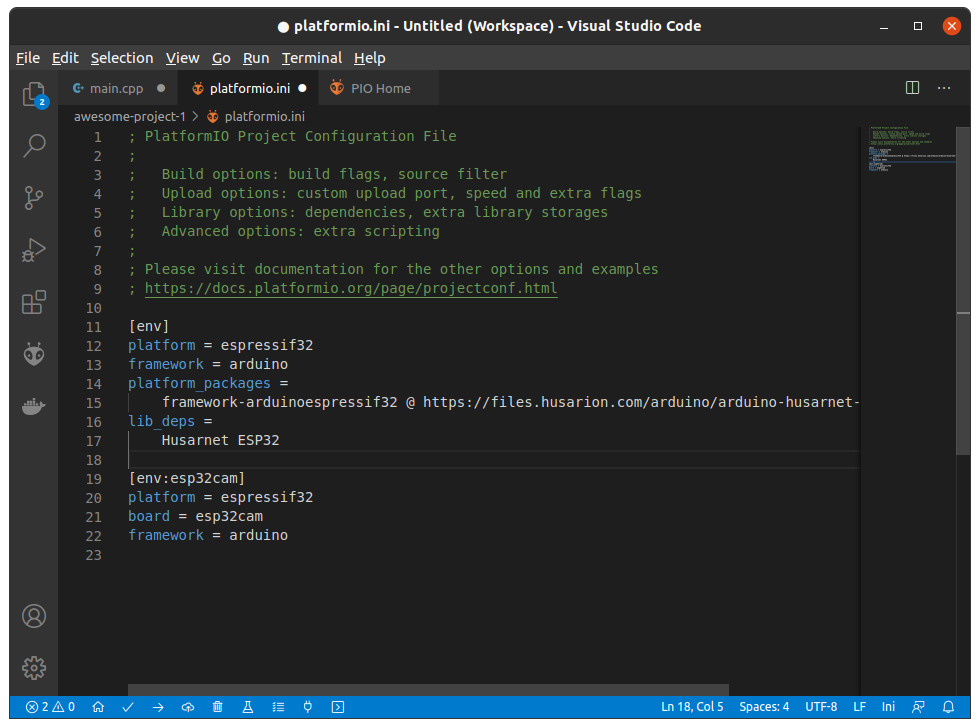
On the screenshot you'll see that there's an env section selected. Copy it and paste it at the top of your project's platformio.ini file. It should look something like this now:
Now you're free to choose any other example and copy it to your src/main.cpp replacing the old content.
Fill in the required data
In the examples you'll find a section for some deployment specific settings. Things like WiFi name and password, but also some of the Husarnet's settings. Let's go through them.
const char* hostName = "awesome-device";
const char* husarnetJoinCode = "fc94:b01d:1803:8dd8:f33d:0a11:c475:c4fe/xxxxxxxxxxxxxxxx";
const char* dashboardURL = "default";
hostName
This is a name of your device. Choose something descriptive as it'll be visible in our dashboard, where you can find IP addresses of your device.
husarnetJoinCode
This is the code that you generated at the dashboard earlier. Paste it here. You can use the same code multiple times for different devices as long as you don't generate a new one in the dashboard. If you do all previous ones will be invalidated.
dashboardURL
This setting is for deployments were you are running your own Husarnet server. As we're using the public one in this tutorial, leave "default" as the value.
Run the code
Feel free to compile and upload the code to your board now. Connecting to the network for the first time takes a couple of seconds and after that you should see your new device as "Online" in the dashboard. (Go to the "Networks" tab and then click on the network you created in the first step.)
If, for some reason, the code does not compile, look at the "Minimal setup" at the bottom of this tutorial and check whether your project has all the required settings and code.
Examples
Reminder - most of the examples here require that you run a Husarnet client on your computer too and that both devices are marked "Online" in our dashboard.
Let's go through available examples now.
Simple webserver
Repository URL: simple-webserver
This example makes your ESP32 start a simple HTTP/web-server. It will be available both on the local network and via the Husarnet. You'll find the addres of your device in the dashboard. Put http://[ip_of_your_device] in your browser's address bar (including the brackets - that's the way you tell IPv6 addresses to your browser) and… voila. You should get a message from your ESP32 now!
Simple webcam
Repository URL: simple-webcam
This example can be used if you have a module supported by esp32cam. It starts a webserver on http://[your-device]:8000/stream that is serving the live stream from the camera in the MJPEG format. Plain and simple.
Make sure to set up cfg.setPins(esp32cam::pins::AiThinker); correctly for your ESP32 dev board.
Component template
Repository URL: component-template
This example is more of a proof of concept rather than a standalone application. Let's assume that you have a couple of devices, connected via Husarnet that you want to monitor and control from a single place. The classic way of achieving it would be to setup additional server, write a dedicated dashboard application and connect to it directly. This example presents a completely different approach as it makes your ESP32 serve a dashboard consisting of components loaded directly from other nodes on the network. Oh. And it auto-detects the nodes automatically. This way each time you add or remove a device from your network you don't have to reconfigure or update other nodes. You can, as usual, connect to any node on the network and see the updated version of a dashbaord almost instantly. The important part here is that your devices don't have to be homogeneous. You can have different sets of components on each node, implementing completely different features and you won't need to update all your devices in order to add those to your network.
How it's done?
We're using the same technology Paypal does - zoid. It allows us to specify some component data (like an external URL) and it'll render them in seamless iframes on demand. With some additional code you can even monitor or control multiple components with a single event.
If you want more technical details - look at the paragraphs below.
data.json
Each of the nodes in the network is serving a special file called data.json. It has two basic purposes 1) list other nodes on the network 2) list components for this given node. This way Java Script in your browser can do all the heavy lifting. First it calls your node for data.json and gets a list of other nodes, then it asks each node for that same file. If your node does not respond (for example your laptop is not expected to respond in this example) - it ignores it and continues, but if it responds with a valid data, it loads and renders specified components in your browser.
Code for generating 1) is pretty much done - we don't expect you to change it a lot, but you're free to change the data for 2). You'll find in the next paragraph what can you do with that.
Component files
Look at the dynamic directory.
You'll see the index.html file - that one handles all the logic described in the previous paragraph and is not expected to change a lot. Each of the changes here would require you to reflash all nodes on your network so please avoid it as much as possible.
You'll also see pairs of files something.js and something.html. Each of those pairs defines a single component. In this particular example those are stream and stream-led. .js file is responsible for declaring and registering the component JS-wise. This is absolutely crucial for autodetection and autoload to work. One important caveat here is that each of the components should have a unique "slug". It needs to be the same in the file path, data.json, component's tag and url and window.component dict key, otherwise things won't render properly. The .html file is basically the content of the component's iframe. You can organize it any way you like, but you must include the zoid's and your component's .js files.
Static and dynamic files
As this project requires a lot of static files, we've made a simple script that should make your life easier when it comes to static files and HTML templates. Files from directories static and dynamic are converted to C++ code automatically and will be available at the root of your webserver. (Ie. dynamic/foo.bmp will be available at /foo.bmp.) The only difference is that files in dynamic directory will be treated with the template processor of ESPAsyncWebServer so you can set some variables like %VARIABLE_NAME% using some additional code in your main.cpp.
There's one caveat though - ESP32 network stack has a limited number of simultaneous connections available so you need to stay as low as possible for this example to work reliably. One way of dealing with that is using some kind of CDN or an external server tor static files and leaving only dynamic files to be served by ESP32 - there's an example for that near the STATIC_BASE_URL definition in main.cpp. Whether you use it it's completely up to you.
Minimal setup
If you used one of the examples - everything has already been configured for you and you can skip this step.
In order to use Husarnet on ESP32 you need a special version of arduino-esp32 framework we've prepared for you. (Hopefully this is a temporary requirement and we will be able to migrate to the mainline version soon.)
Add the following lines to your [env] in platformio.ini:
platform = espressif32@2.1.0
framework = arduino
platform_packages =
    framework-arduinoespressif32 @ https://github.com/husarnet/arduino-esp32/releases/download/1.0.4-1/arduino-husarnet-esp32.zip
lib_deps =
    Husarnet ESP32
The version in the URL may change in the future so have a look from time to time for new releases.
Minimal code to run Husarnet on your ESP32 goes like this:
// You need to include our header files
#include <Husarnet.h>

// Setup some credentials
// This will be visible on the dashboard
const char* hostName = "awesome-device";
// You'll get one in the dashboard. See how on docs.husarnet.com
const char* husarnetJoinCode = "fc94:b01d:1803:8dd8:f33d:0a11:c475:c4fe/xxxxxxxxxxxxxxxxxx";
// If you want to use the instance hosted by us - leave it as is
// If you're hosting your own - change it to proper URL
const char* dashboardURL = "default";

void setup() {
    // Setup your code here as you wish, but don't forget to connect to Wi-Fi first!

    // Connect to he Husarnet's network
    Husarnet.selfHostedSetup(dashboardURL);
    Husarnet.join(husarnetJoinCode, hostName);
    Husarnet.start();
    // Note that connecting to the Husarnet's network takes a couple of seconds
    // and takes place asynchronously.
}

void loop() {
    // There are no special requirements on how you can use the loop.
    // Husarnet's code is running in the background and you can use it as if your
    // ESP had an additional network connection, straight to your VPN!
}
More Resources
Just clone the following projects, open in Visual Studio Code with Platformio and all configuration is there by default:
- Minimal Web Server - AsyncTCP Webserver
- More Advanced Web Server - AsynTCP Webserver + Bootstrap 4 + web sockets + TFT display (optional)
- Simple ESP32 to ESP32 Communication
Also visit Husarnet profile on Hackster